
Pop Cooler Project
It stunk.
That is about the kindest thing I could say about that decrepit, ramshackle, old piece that I had scavenged from an estate.
It had suffered from its long years in a leaky shed. Pieces were missing, rats had chewed it and nested in its interior. It shifted alarmingly in all directions when it was moved. In short, it was exactly my favorite kind of project, a challenge to restore trash to treasure.
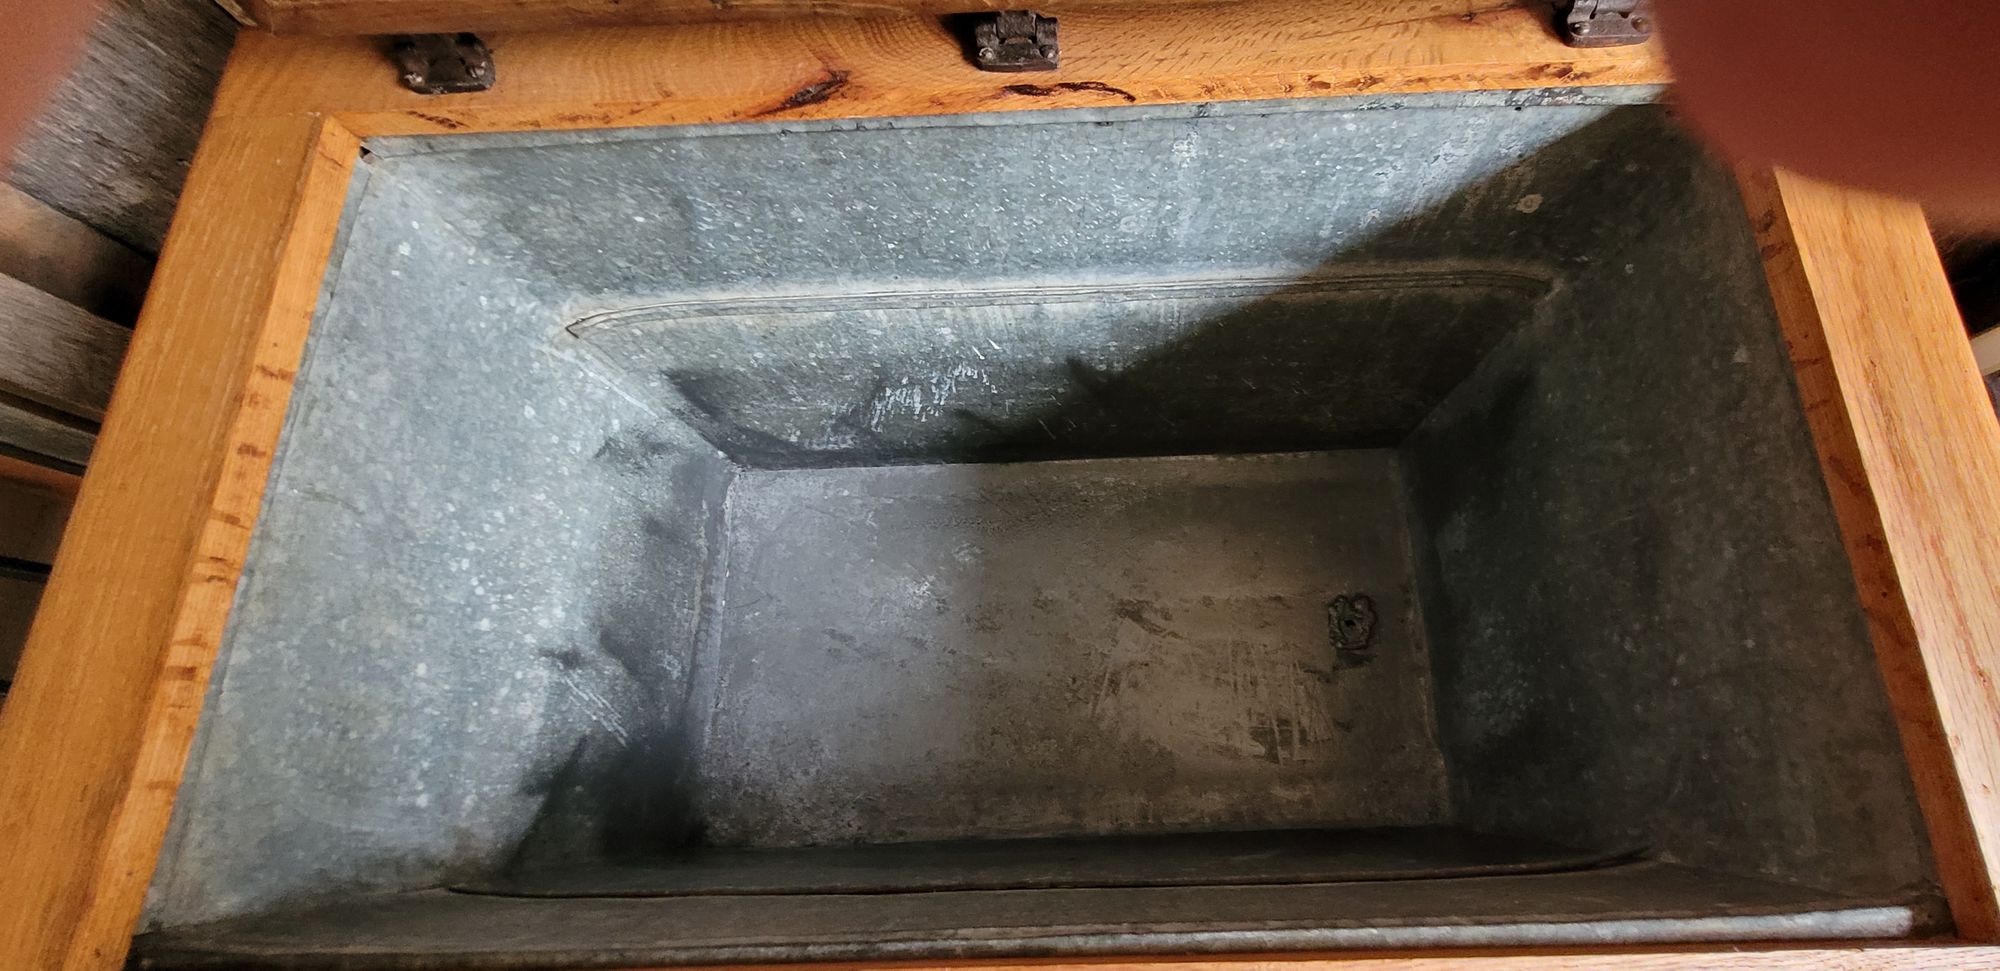
But, wow, did it stink. The odor permeated my shop, even after I had disposed of the actual rat bedding. The galvanized interior was coated with a gummy substance that didn't bear thinking about. A good cleaning was the absolute first step before anything else. Thinking I should probably be wearing a mask also, I at least used some leftover vinyl gloves as I sprayed and wiped, trying not to breathe in the stench, while using an entire bottle of cleaner and a whole roll of paper towels. Coming back into the shop the next day, the odor had not magically disappeared. It still reeked. It was disgusting. It clung to the back of my throat.
This is where the project ended for the winter, perched on a rolling dolly and wafting its stink throughout my shop. Cold weather and tax season put the work on hold.
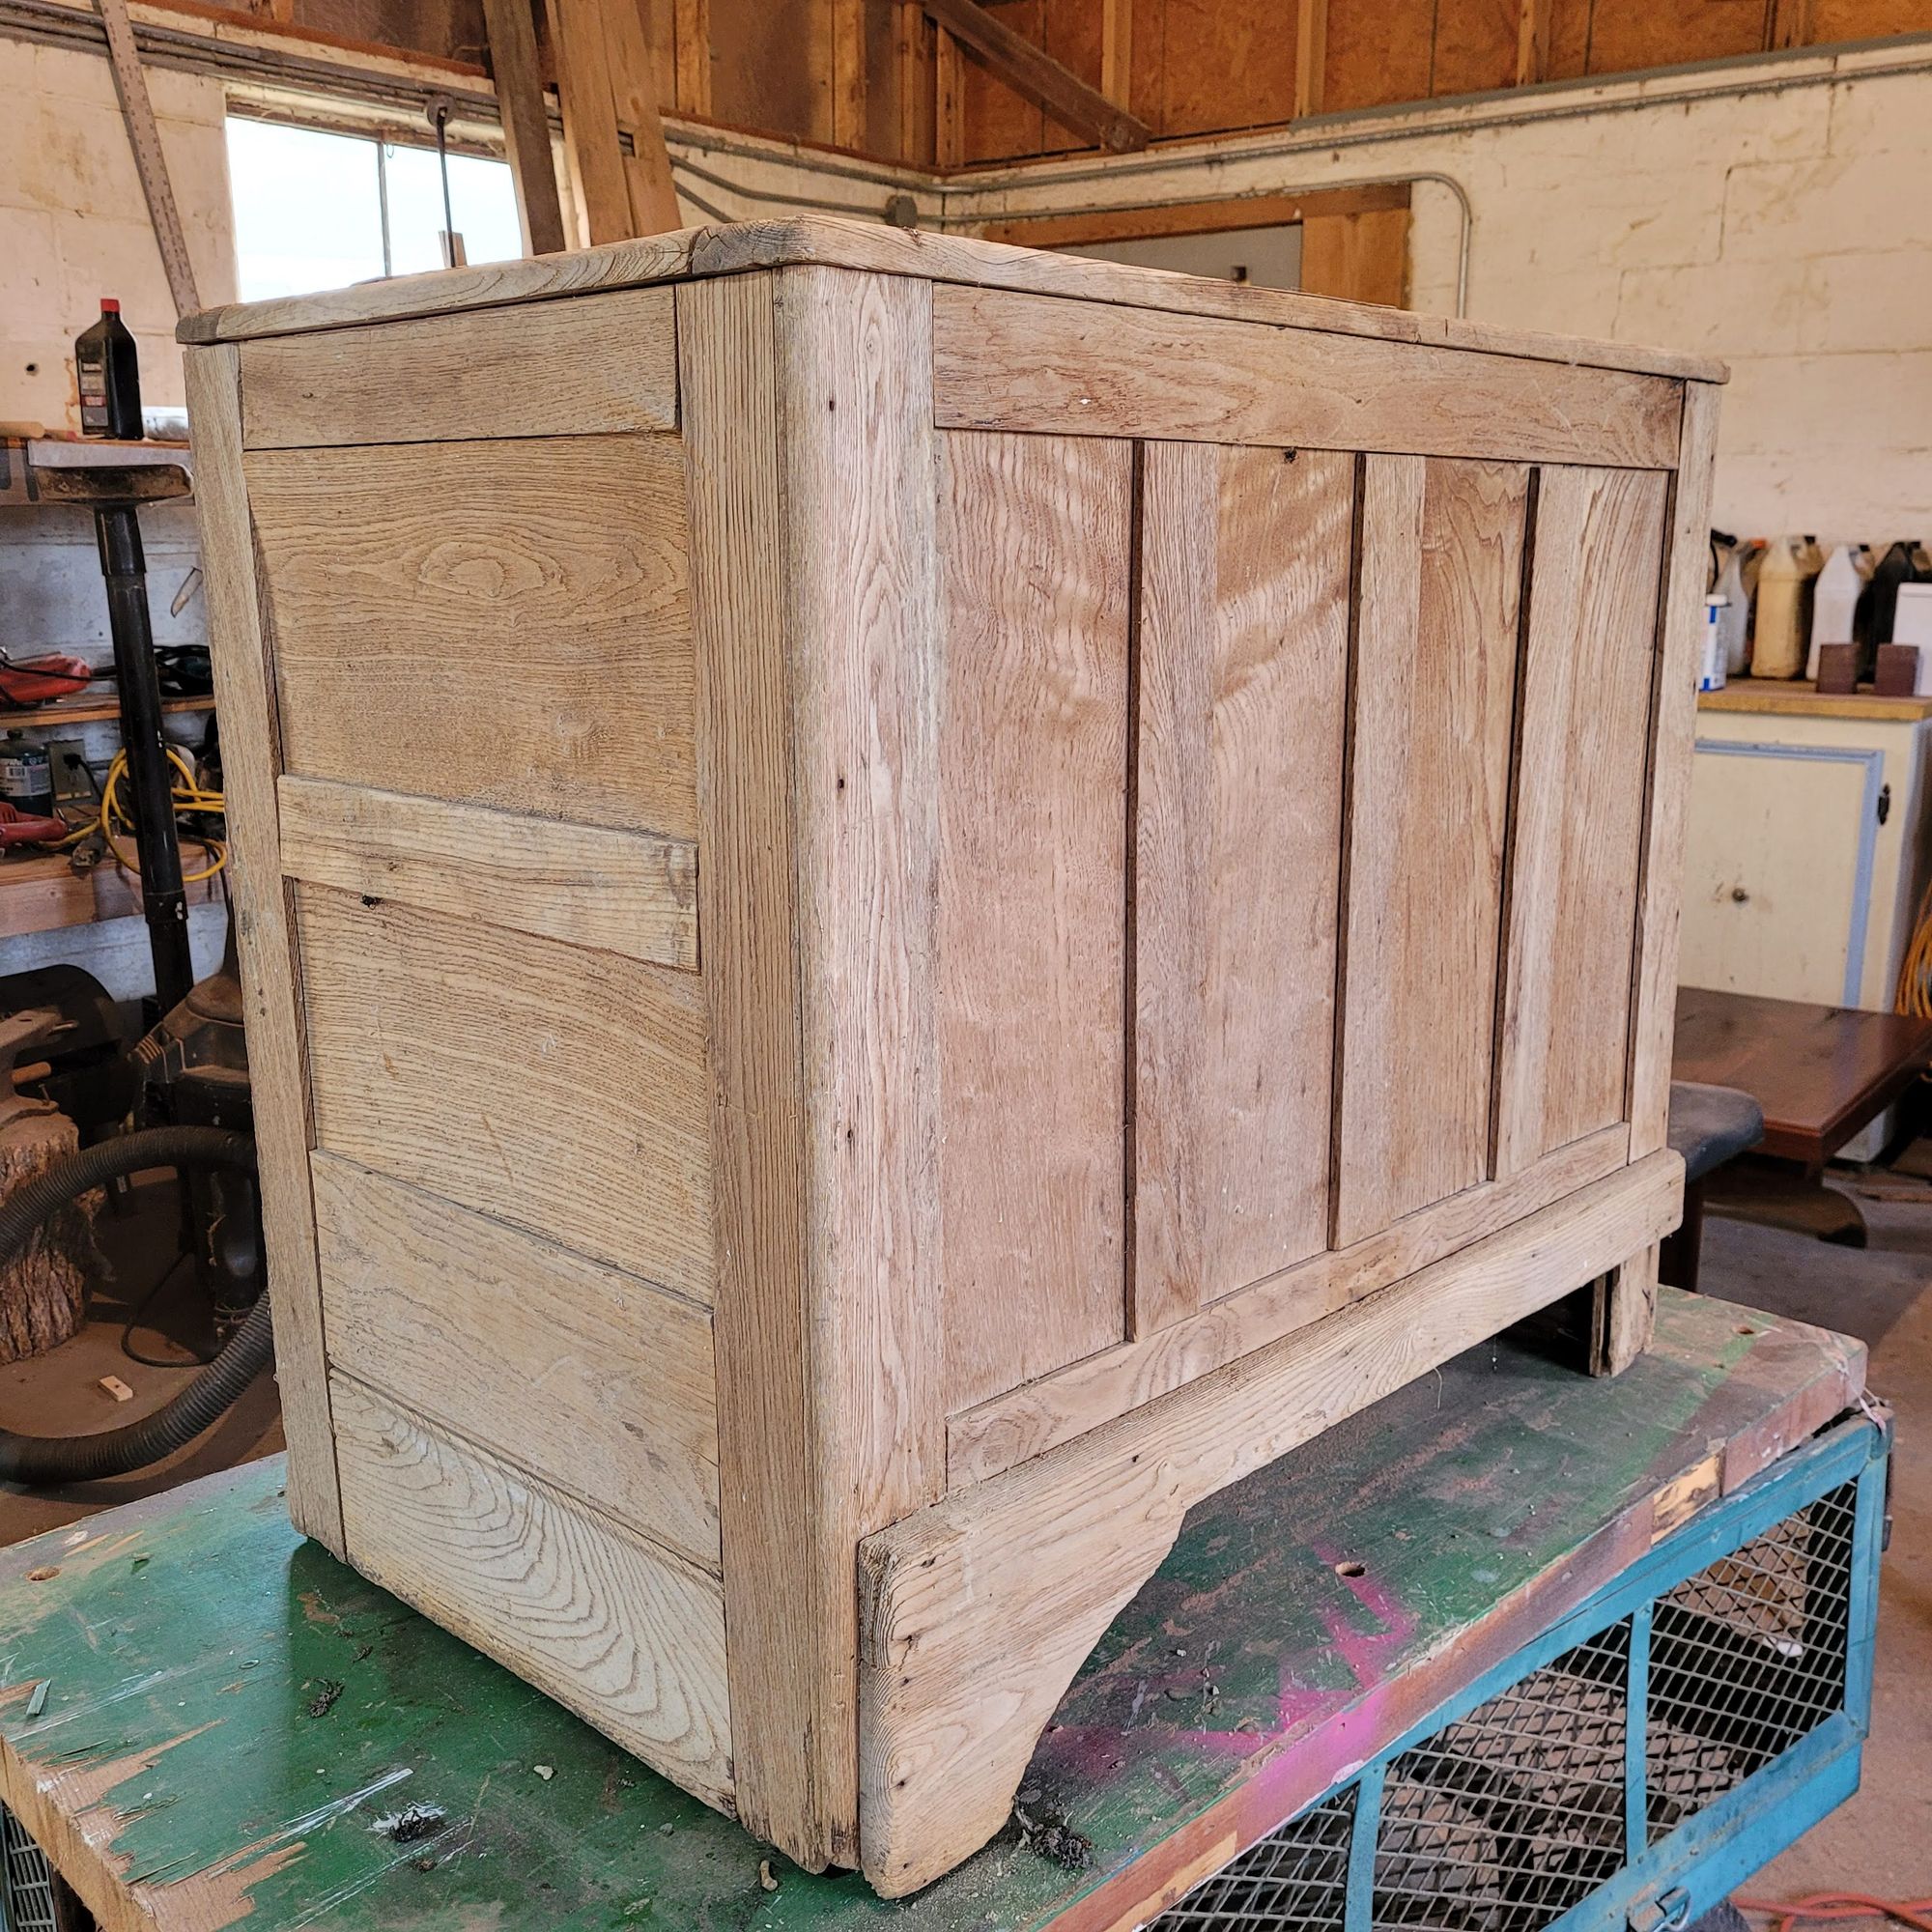
Freed finally by the arrival of April 18, (the last official day of the main tax season) I finally had time to escape to the shop. There awaiting me was the pop cooler on its dolly. It took up a lot of room and I vowed to make it the first project of the year. But where to begin? I started removing loose pieces, trying to mark and document how and where they came from, so I could put them back together. One piece interlocked with another (I found myself hearing, the thigh bones connected to the - knee bone), and I envisioned soon having nothing but a stack of random parts. I eventually got to a few joints that seemed stable enough to be a good starting point for the base. And the more I took apart, the more stink I released. In between the inner and outer walls, there was a layer of rotting tarpaper and cardboard. As I went, I removed as much of it as possible, giving my knuckles on both hands a pretty good scrape, trying to each as far down in as possible. Of course, it was so old, it crumbled and fell apart, so I used the skinny tool on the shop vac to try to suck out what I couldn't reach. Okay. So now I had the mostly bare bones of the frame exposed, and I could begin to see what I was working with. In the fight-against-the-stink, I wiped all of the pieces I removed with spray cleaner and sprayed all the crevices I couldn't reach. Was it my imagination, or did my nose tell me the smell was marginally less bad?
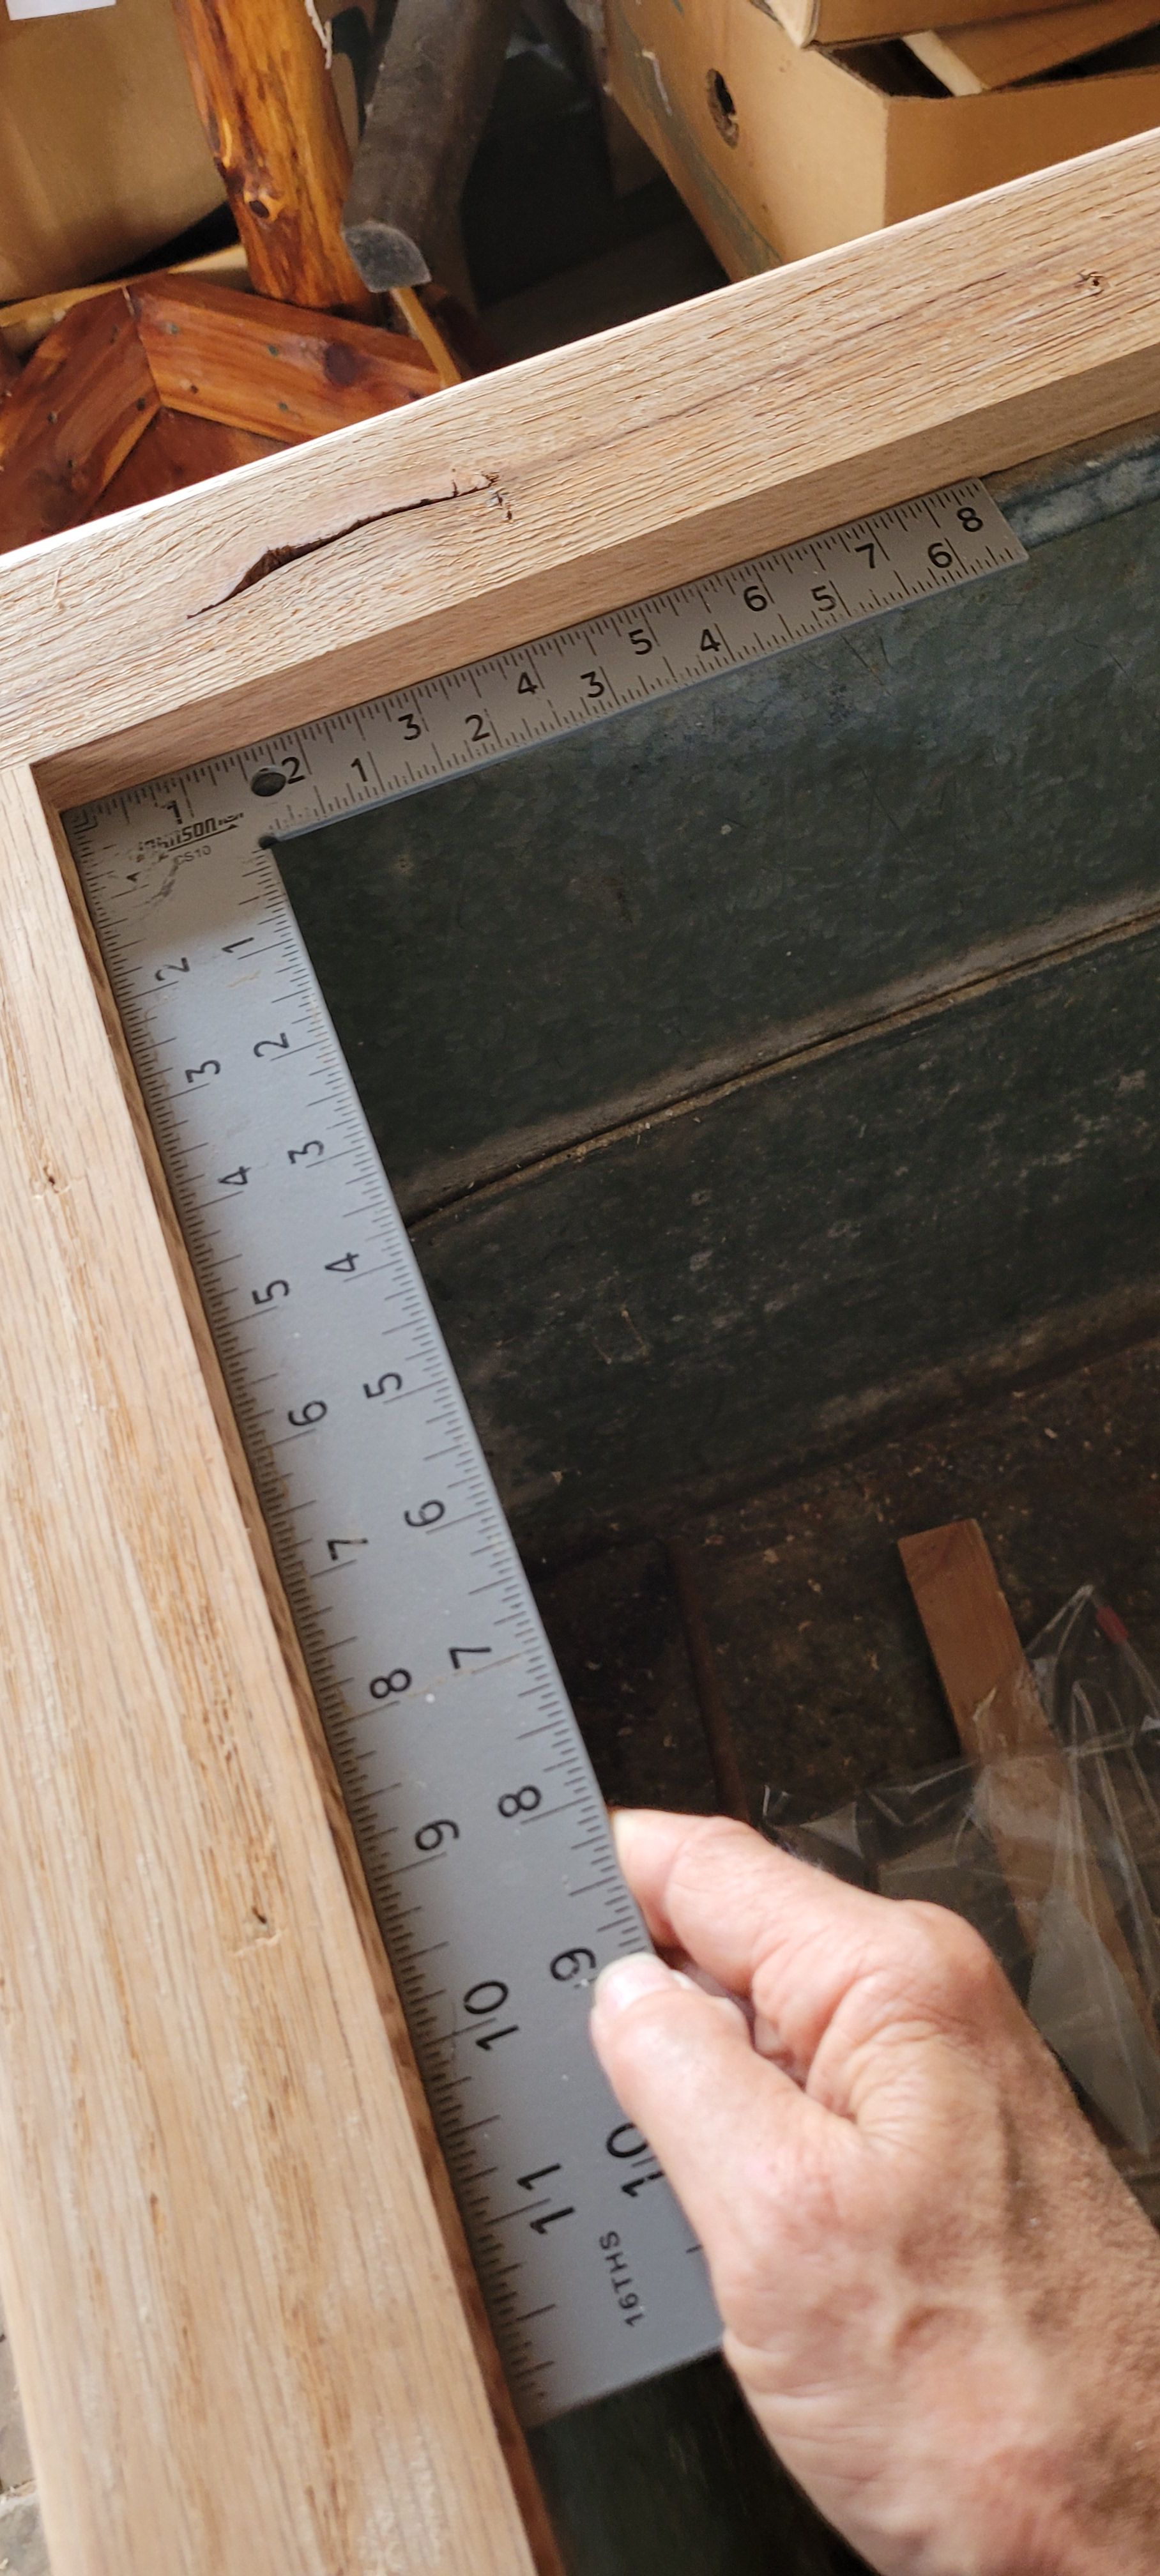
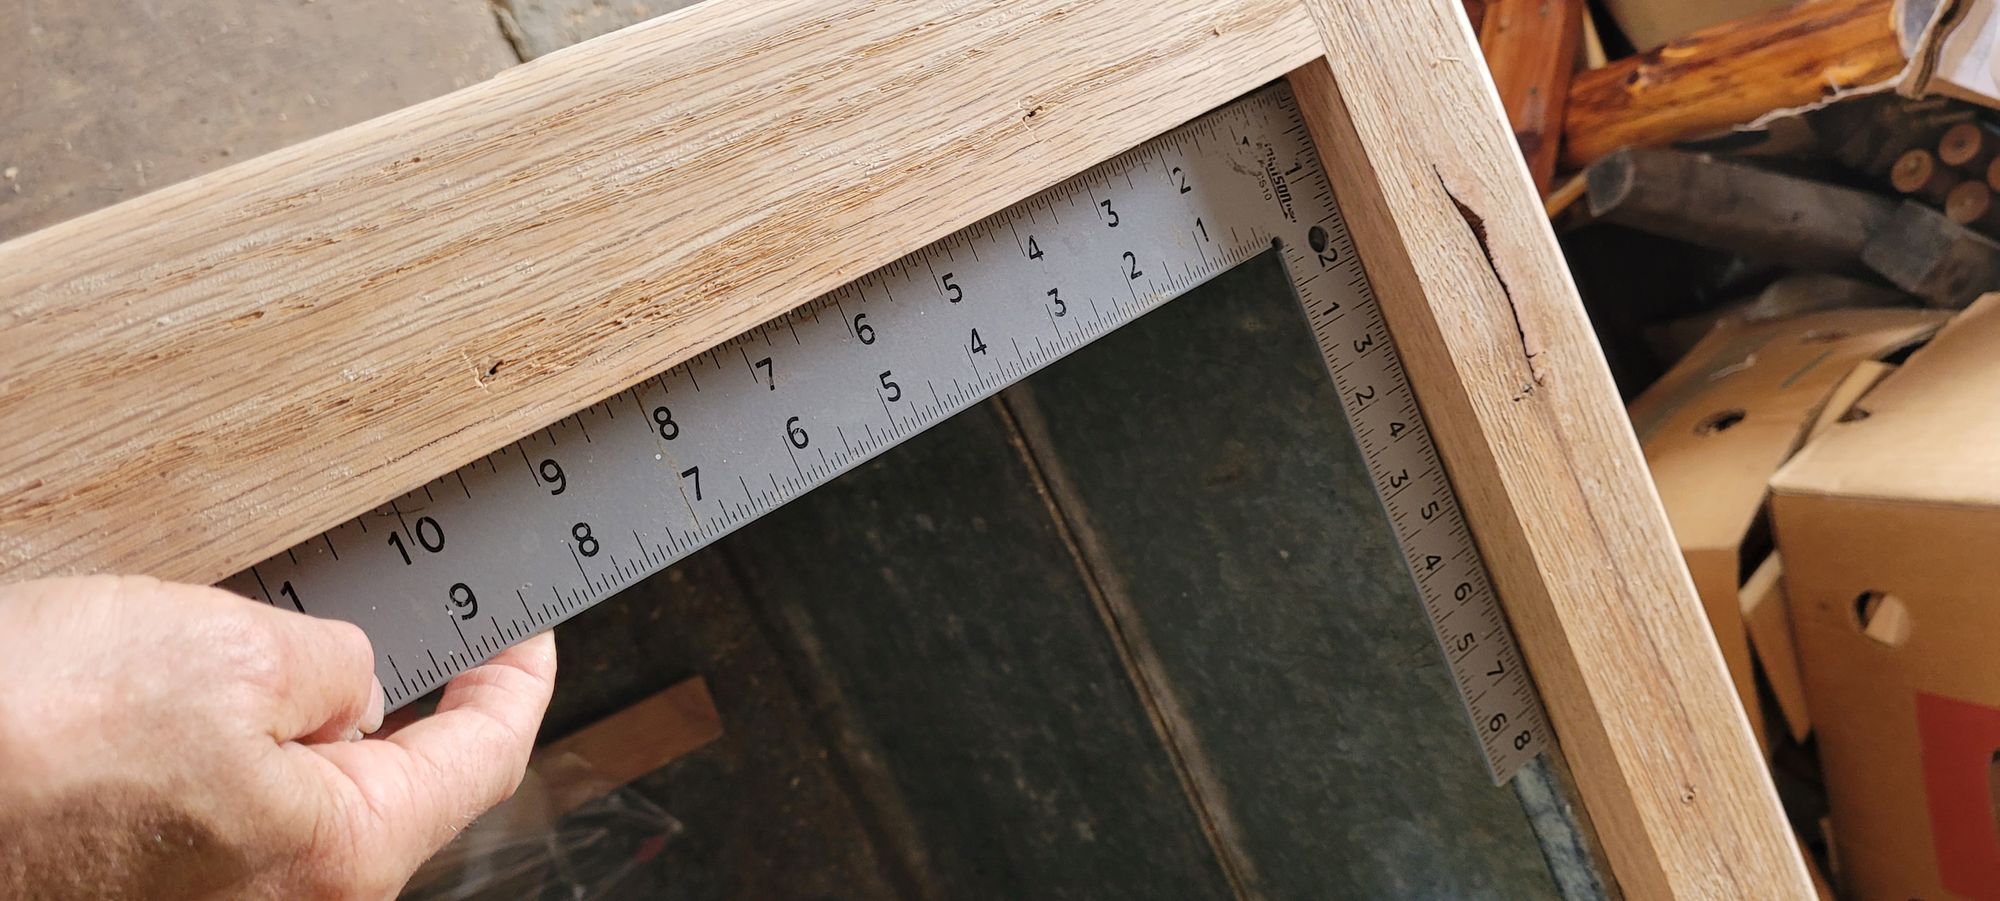
I put some clamps near the bottom and began tightening them to see how well the joints might pull together. Things began moving and the sloppy joints started coming together in a better fit. I took some measurements and checked for square. It made me happy to see that it wasn't too far off. That was a bonus. But the top was far more badly sprung than the bottom. A couple of pieces of the top frame were gone and other pieces were warped and curled. There was a lot of separation. I put some clamps near the top and applied some pressure. I couldn't see hope for a completely tight fit, and that would leave the top dimensions larger than the bottom, giving it kind of a Picasso effect. I backed off the bottom clamps and tightened the top as much as I dared until I reached a kind of happy medium.
Still close to square. Still happy.
This is after I had it pulled together and somewhat stabilized. I took 'before' photos. They must be hidden deep in some file in Google Photos, because I can't find them.
So I know what my dimensions are going to be. As I add pieces, gluing and clamping, I have to make sure to work in those parameters. I started adding the 1/4-inch panels into their slots on one side. Progress! I had on side reassembled up to where it fits into the side piece of the top frame.
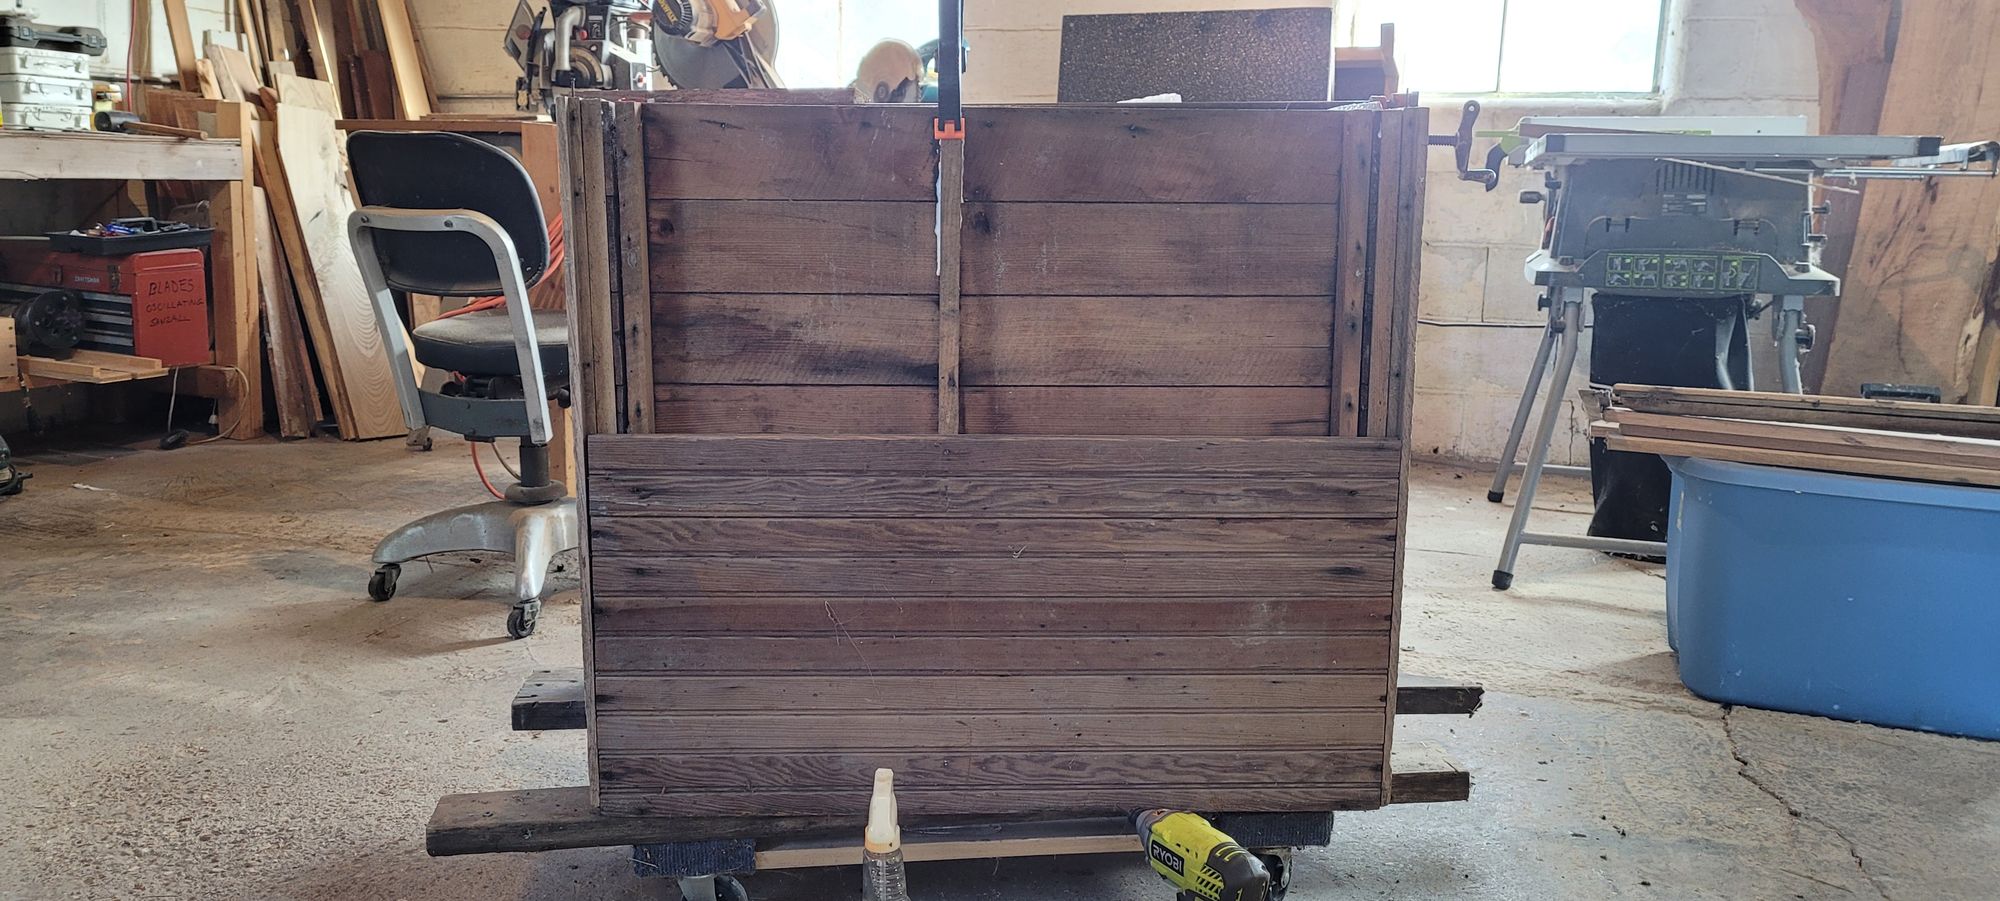
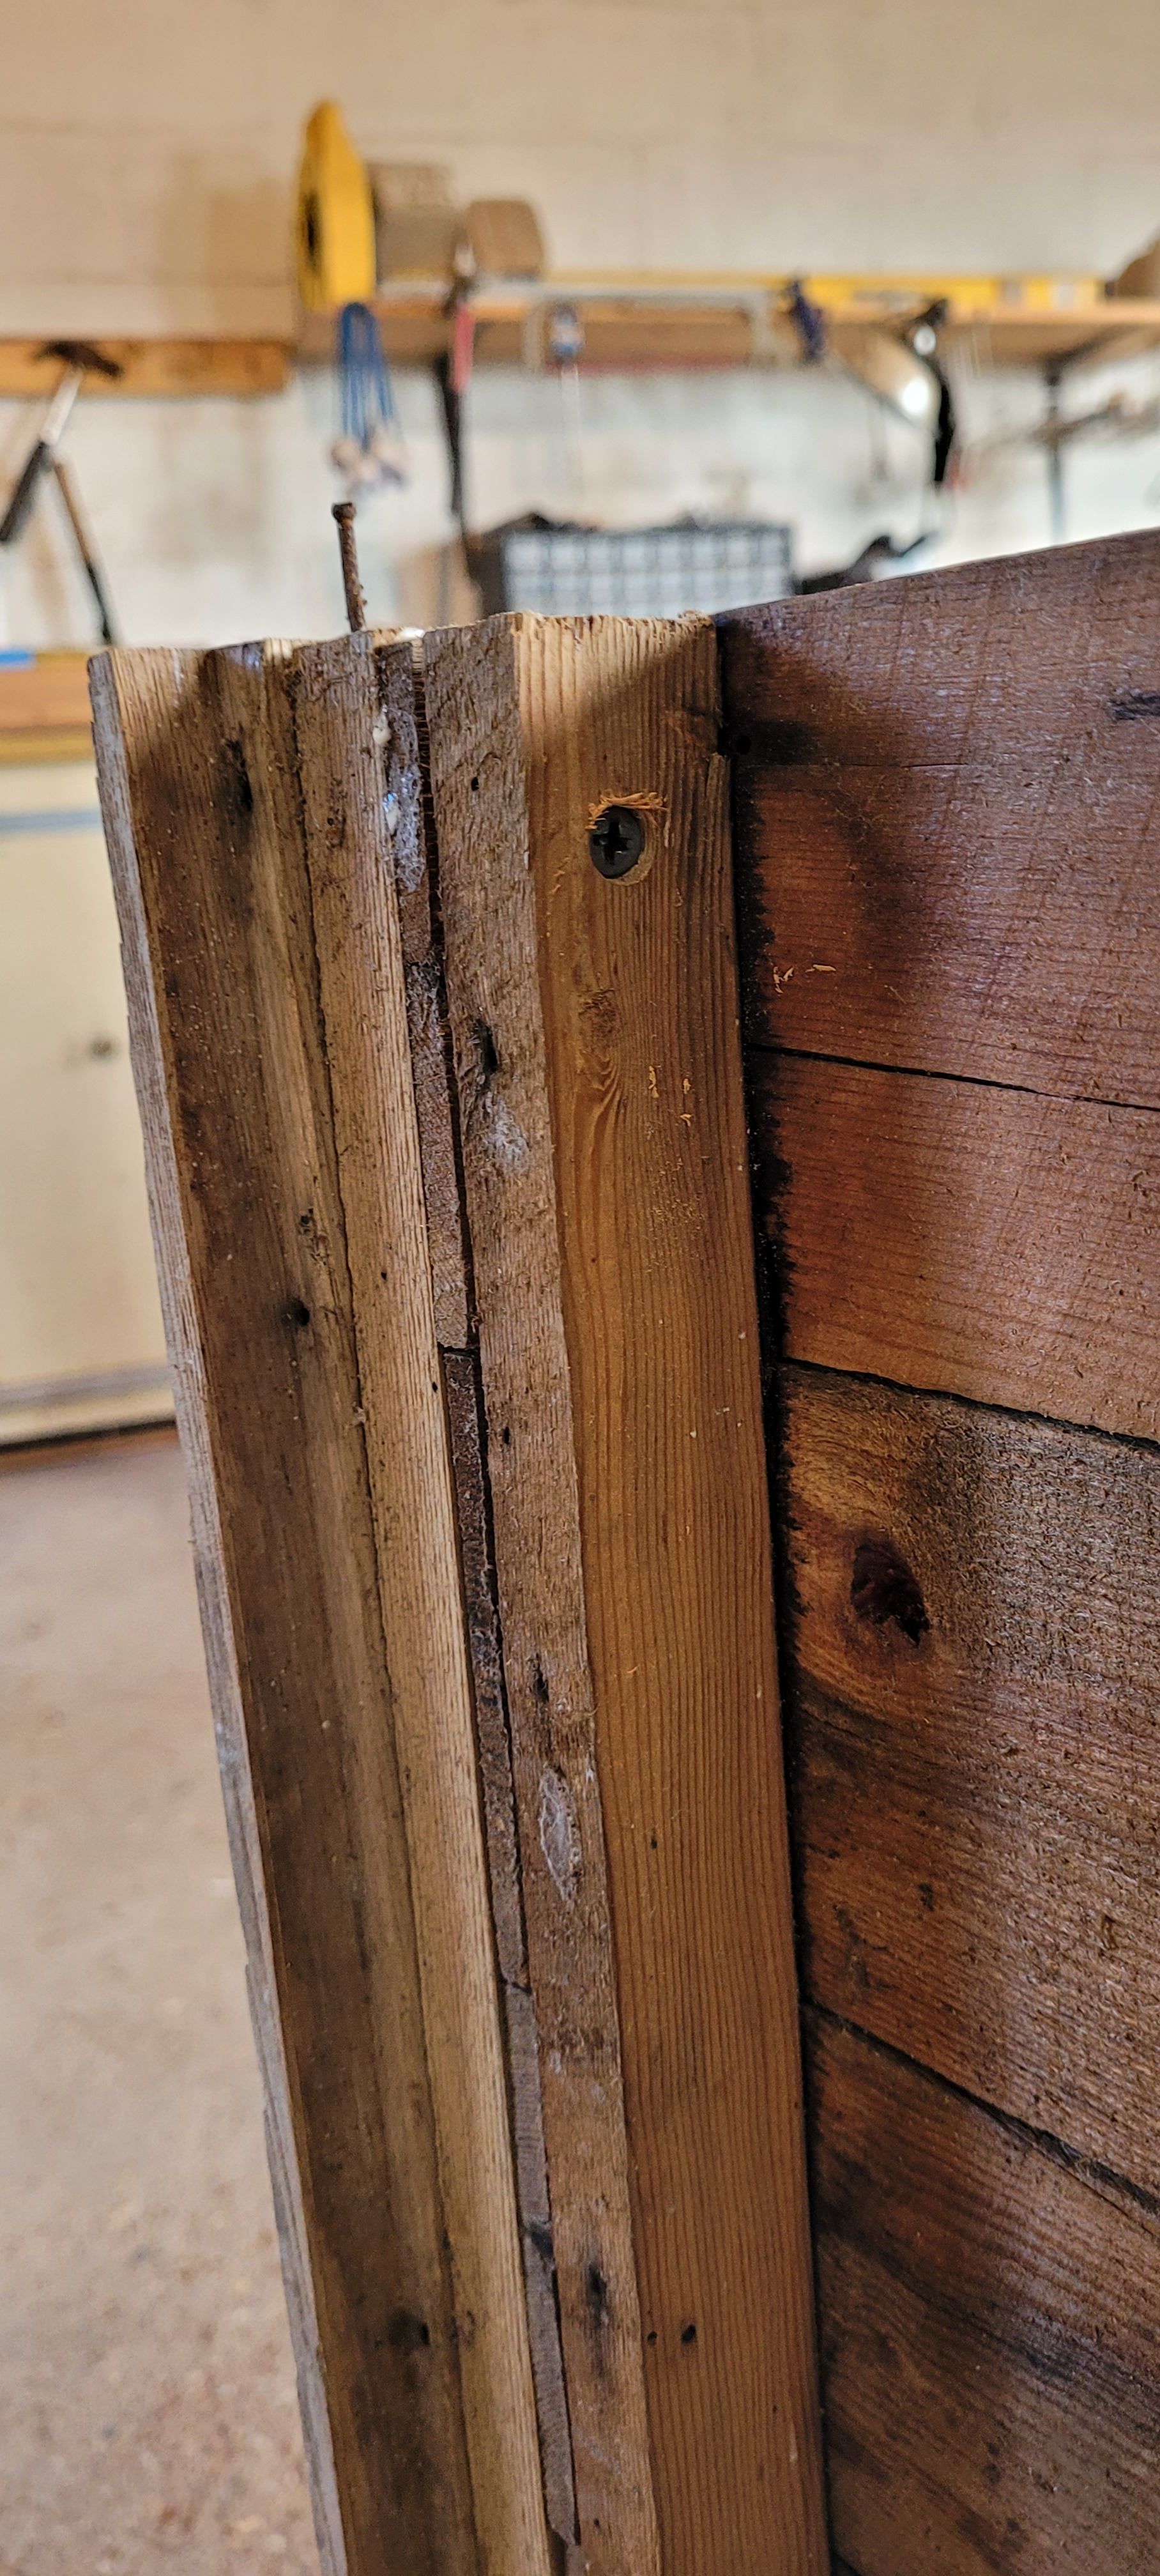
The back was made of 1/2-inch beadboard, and it seemed fairly solid. I debated whether it was necessary to take it apart. There were a few places on the ends that were loose but maybe I could just shoot them with the brad nailer and secure them. Except there didn't seem to be anything to shoot them to. I started removing pieces, and the only frame I could see for the entire back were three upright 1 x 1's, the center one loose and at a crazy angle. It had been built with only these three uprights to attach the galvanized interior to. That didn't seem to be great engineering, so I cut, glued and screwed in some fresh sturdy, supports to attach the back to, also adding blocks along the top to, a: make a complete frame and b: provide a solid run when it was time to begin pulling the galvanized box back into place. This was definitely learn-as-you-go construction. The whole top seemed to be comprised of just these flimsy upright pieces, so I ended up blocking between them around the whole thing. Otherwise, there seemed to be very little material to attach the top frame for the lid or the lip of the metal box into. I wasn't sure if there was a reason it was done that way, but the blocks were in now, and it would be a booger to get them out.
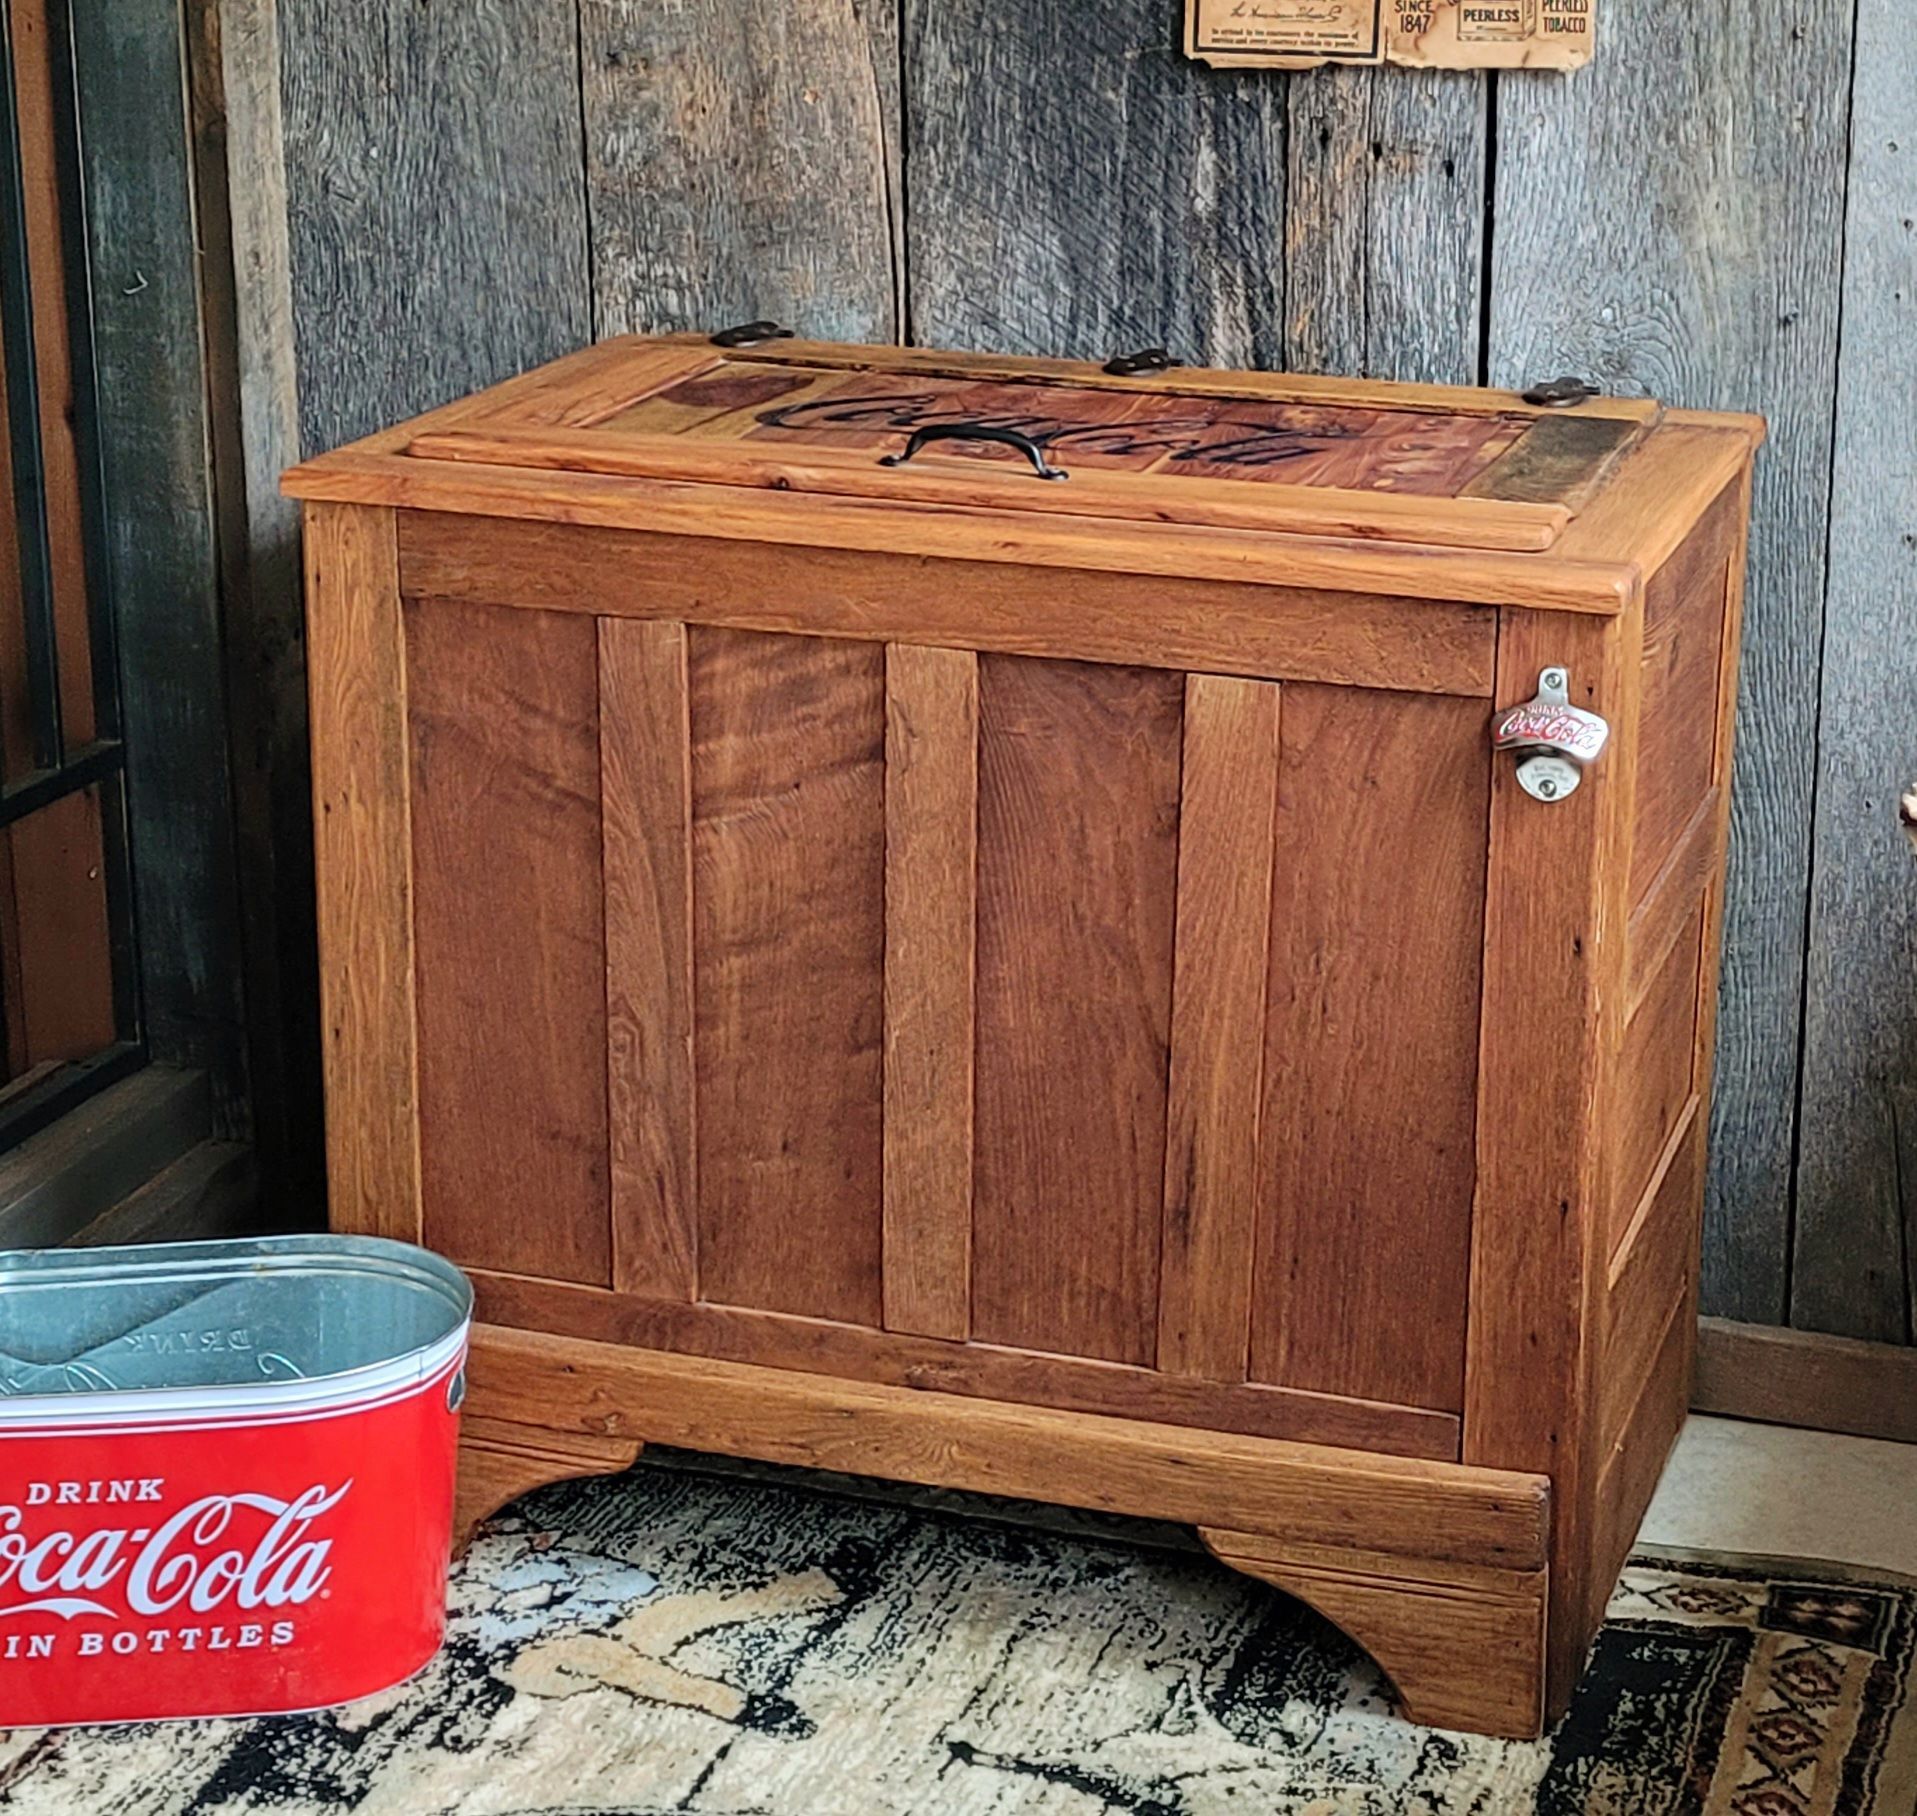
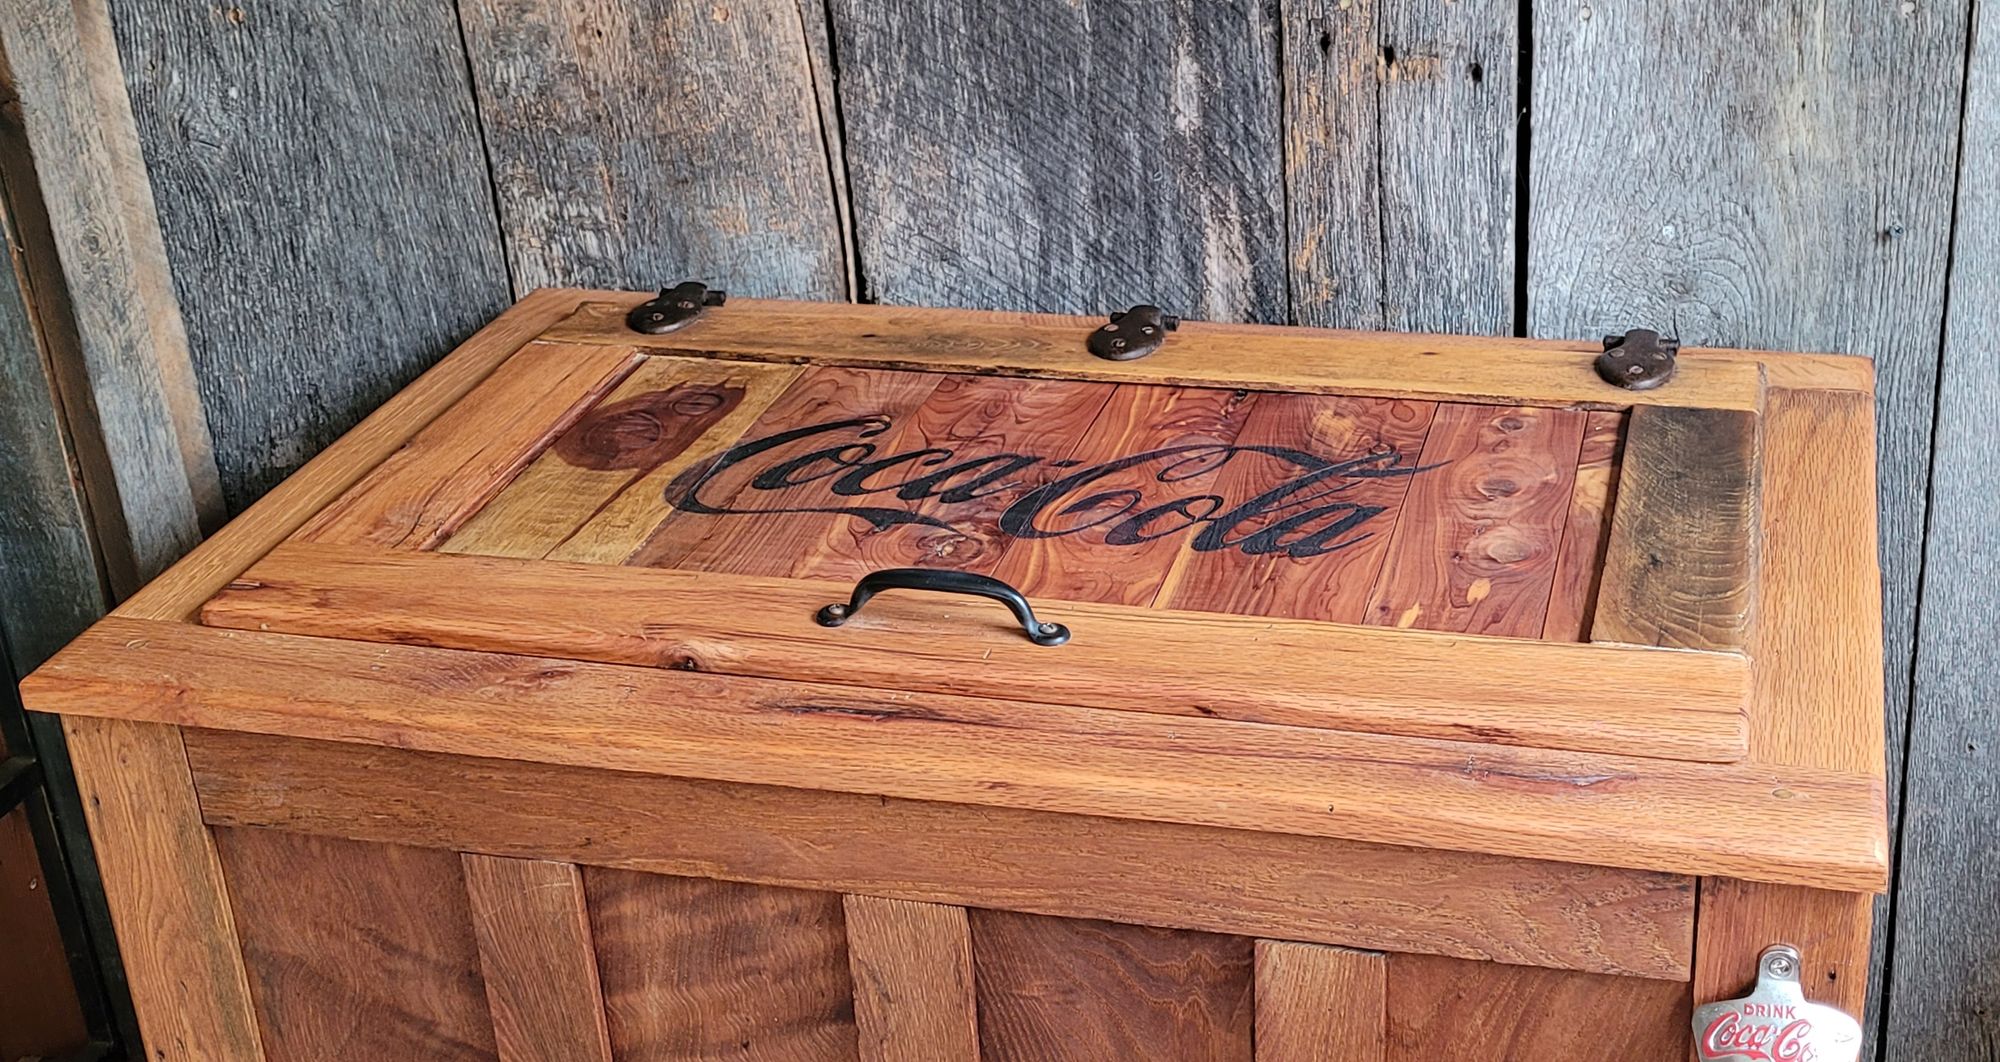
After starting the project in the spring, I finally put the finishing touches on it late in October. It was a start-and-stop project for several reasons. First and foremost, some of the pieces were either missing or so badly damaged, they had to be reconstructed. This meant planing from rough oak to thickness, routering various rabbets, slotting others, and on one piece, shaping a 1-inch curve along one long edge. This piece and three others that I could salvage from the original, were attached to the underside of the lid and fit snugly into the opening when it was closed. I didn't understand the purpose of them for a long time, but wanted to stay as close to original as possible, so I faithfully duplicated it. One day it dawned on me - this cooler pre-dated rubber seals and these wooden pieces served as an air lock.
Another reason it took the whole summer and most of fall to complete is that it was a head-scratcher, and I would spend a lot of time looking and thinking over the next step to be sure it was in the logical order and wouldn't be in the way of a piece that should have been done first. Also worked on a lot of other things, in between. But a little at a time, it came together. I sent the center portion of the lid to have it laser engraved, considering several options but finally deciding to go with the traditional Coca-Cola, and probably breaking several copyright infringement laws by doing so.
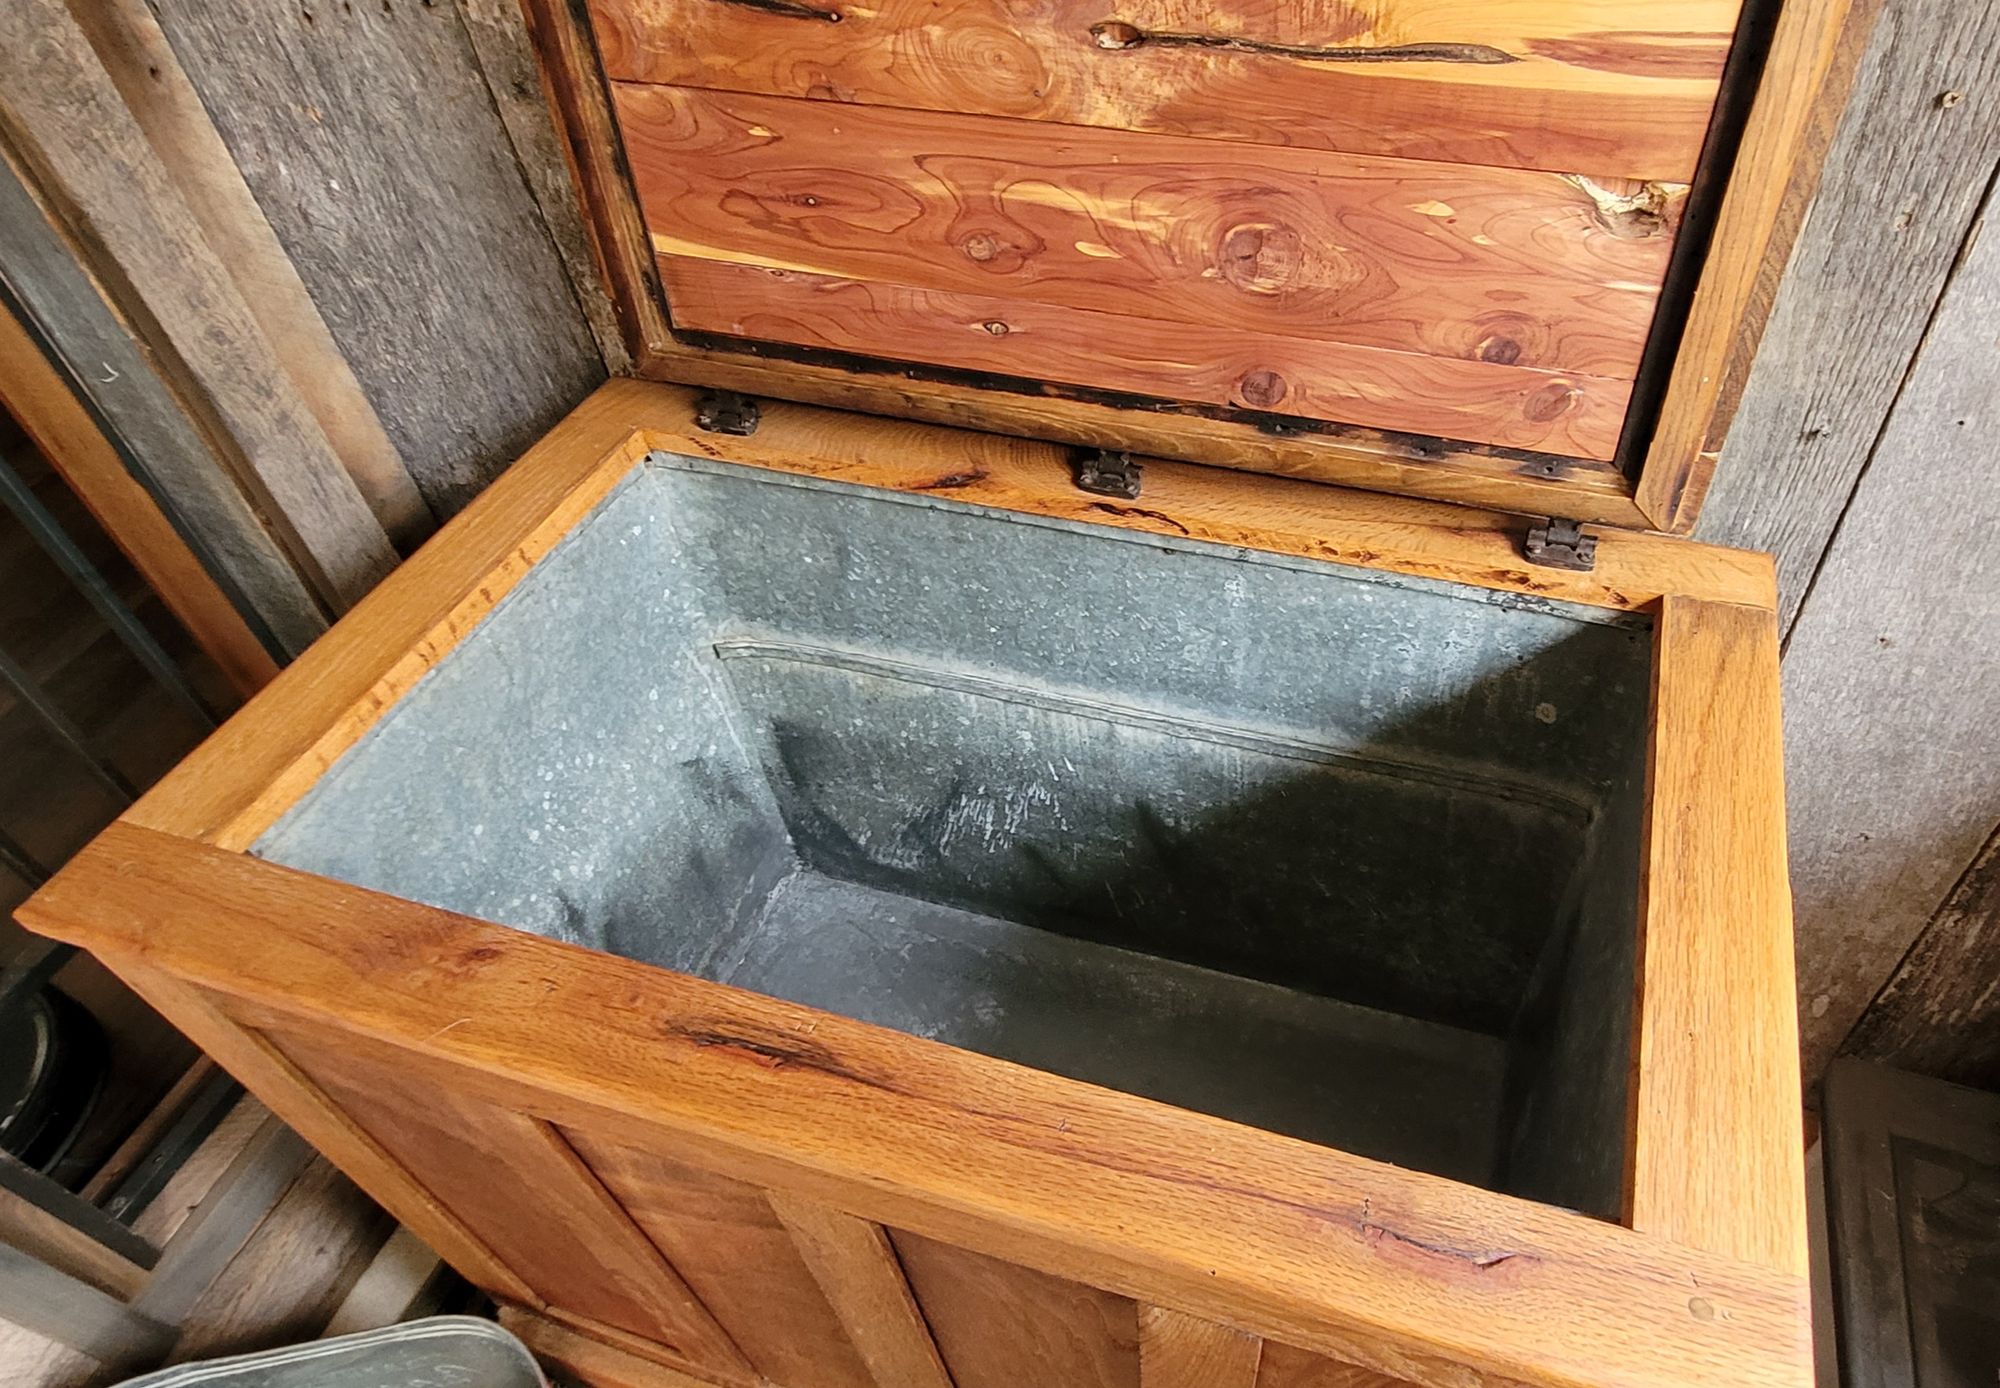
Now that the frame was secure, the galvanized tub part had to be pulled into place and secured. I won't go into detail, but it involved clamps, tin snips, rubber mallet, and tiny little nails with a flat head so the top flange would lie smoothly over them. Tiny nails, hammered through tin. They were sharp, and it went better than I expected, with only a few mashed fingers. When I was done, lo and behold, the interior corners were within smidgens of being perfectly square. Hallelujah, the angels sing! Thanks to the after-market blocking, I had plenty to nail to.
Still square after top frame is attached!!
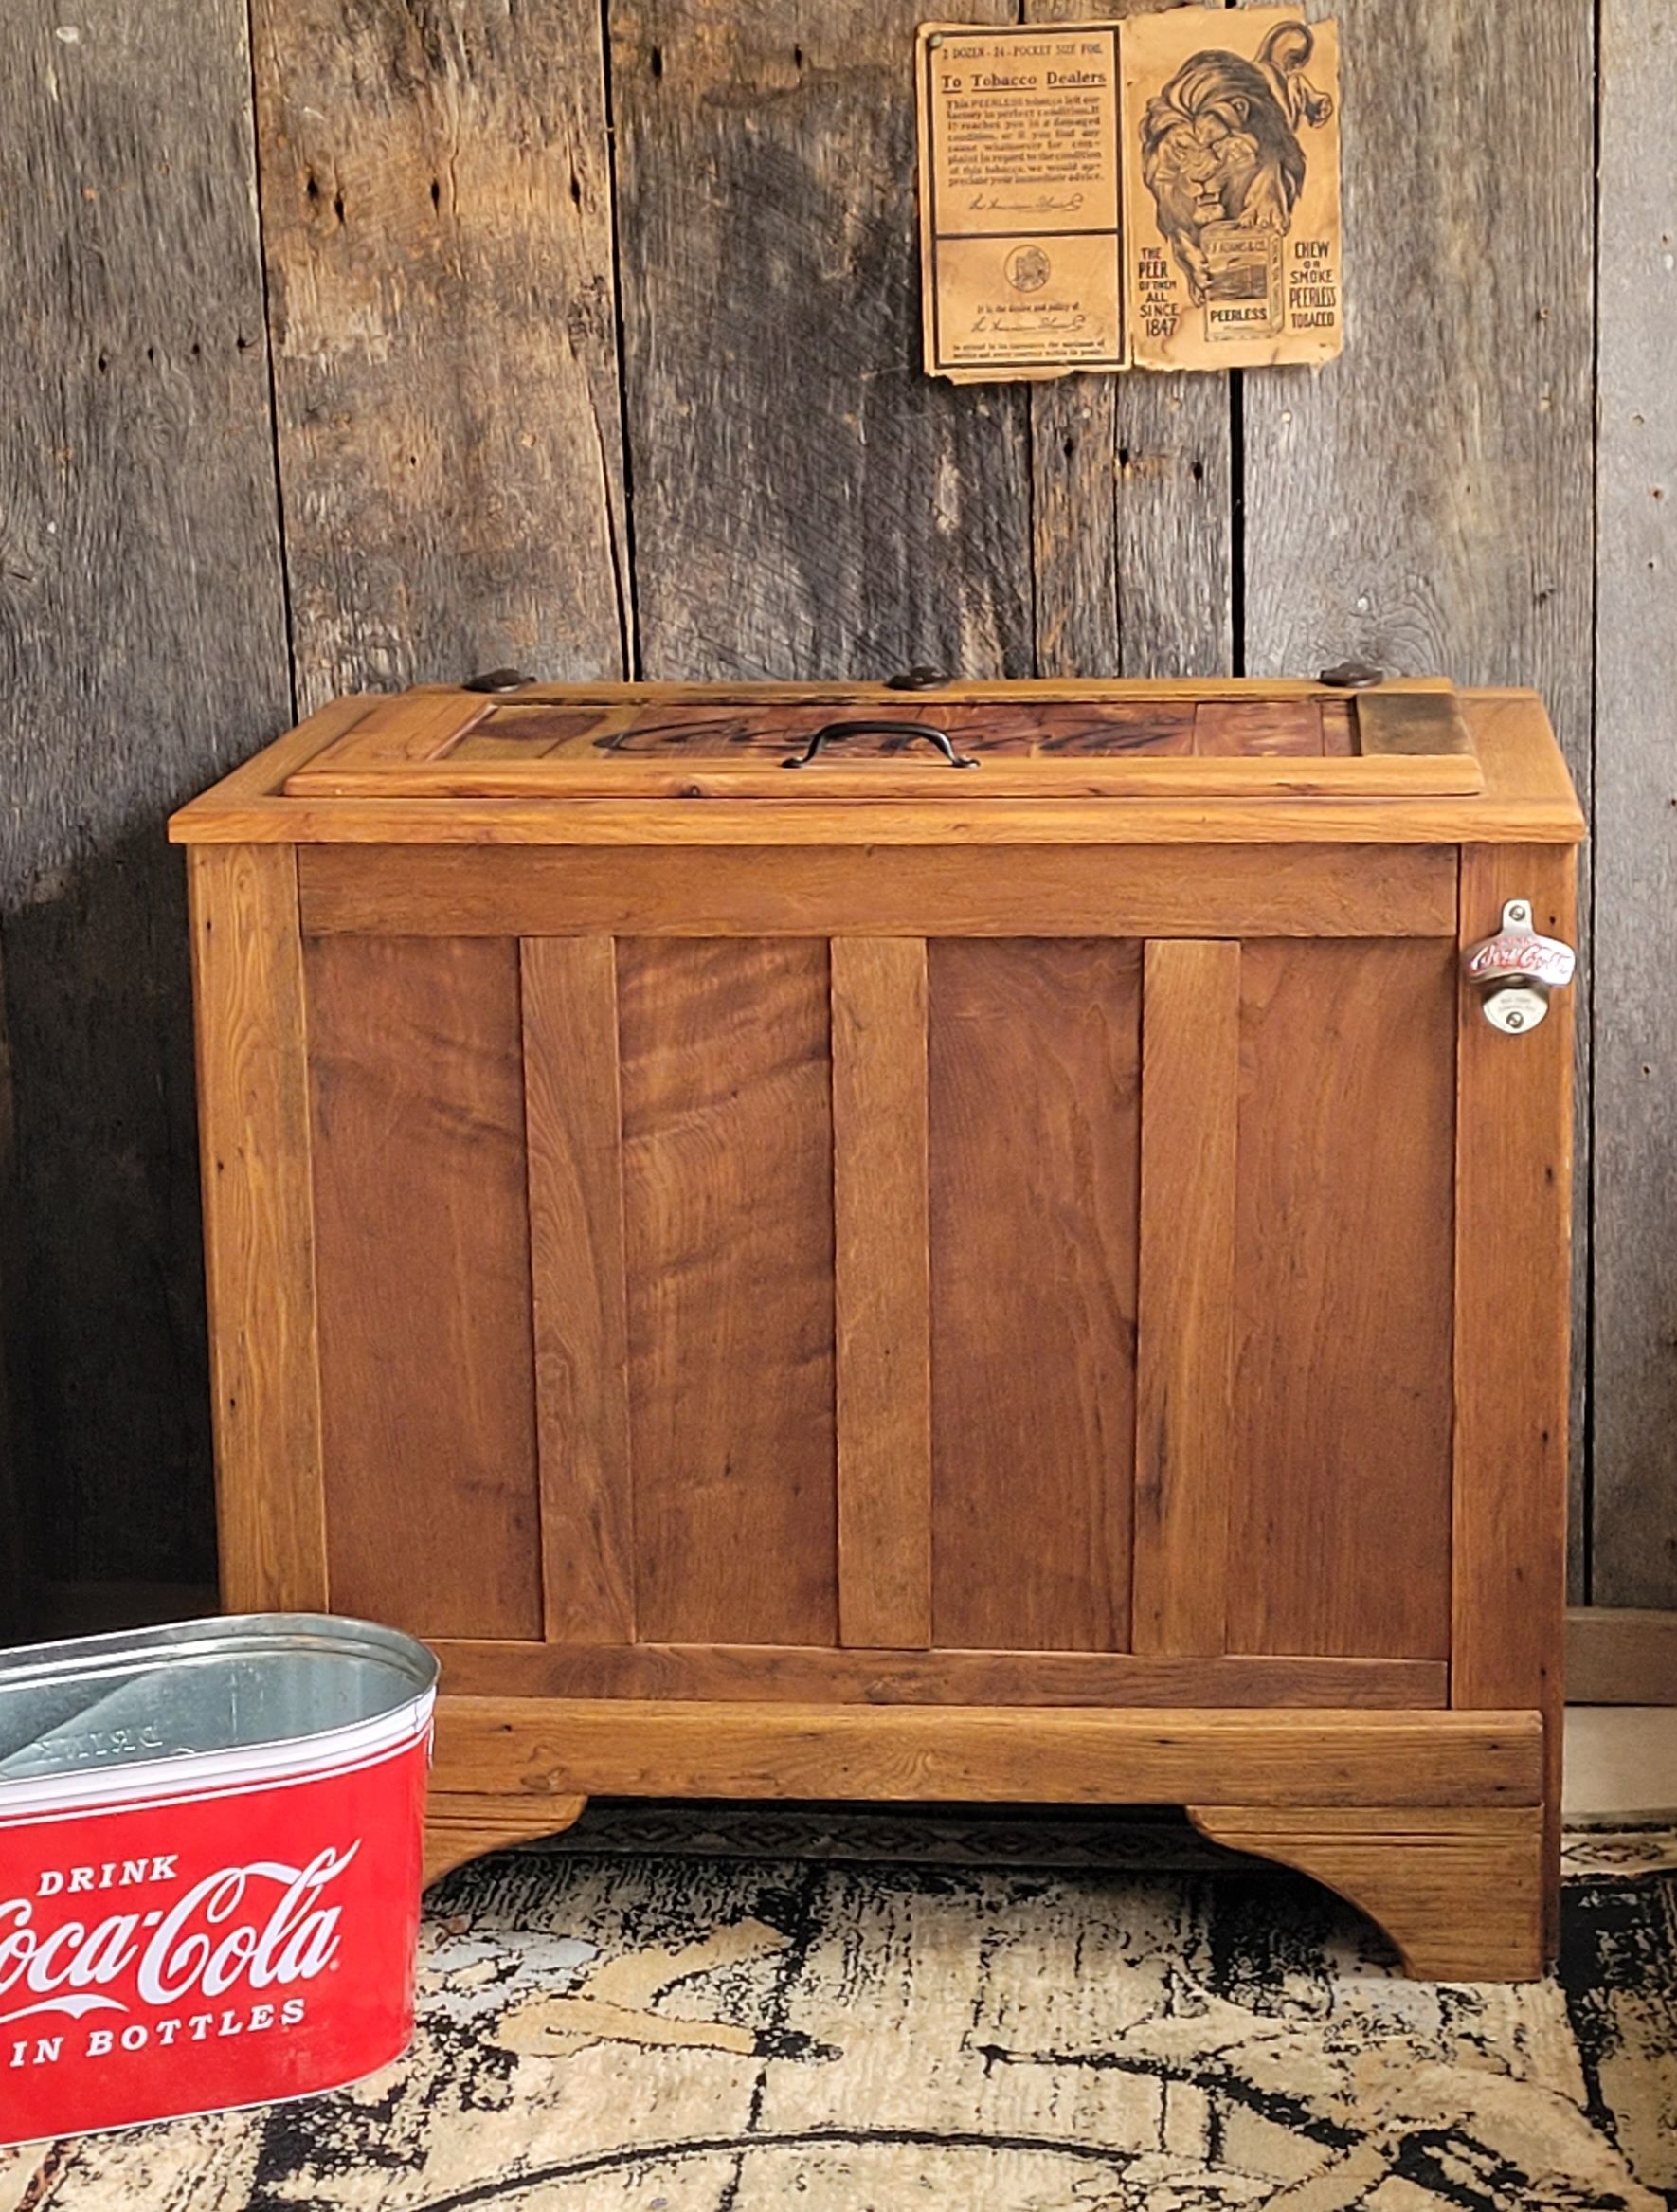
Ready to fit the top frame! Big milestone. All the raw ends would be covered, and it would begin to resemble a finished piece, ready for the lid to be attached. I broke with tradition and constructed the frame with Kreg pocket screws instead of the original dowels. I probably looked at it for a week before I finally got the courage to permanently attach the frame to the top. It didn't seem to fit perfectly square with the carcass but thank goodness for clamps. They are a woodworker's best friend. A couple of turns of the handle and the corners moved obediently into place. I fastened it down. The cabinet was finally secure enough to lay over on its back so I could add a little extra support underneath. Finally, it was square and solid. I cleaned it thoroughly, and reverently brushed on the first coat of CWF Flood sealer. CWF Flood is actually a deck sealer, but I like it for my old wood projects. It seems to feed and rejuvenate old, dry wood, a modern-day equivalent to linseed oil.
The story goes on and on. It kept coming together so nicely, so much better than I had expected, that I kept taking more and more time to hone the little details. Clean the years of calcium buildup from the tub with Lime-Away, and when that didn't work, a little muriatic acid. Rust remover, scrape, a coat of hammered metallic spray paint to mimic the galvanized. And always, some of these were things I didn't always just have on hand, so would have to delay for a trip to town.
The day came to attach the lid. All but one piece of the frame to the lid was salvageable, and I had the original hinges and slotted screws. I put it on. It fitted snugly down into the upper frame on the cabinet. I'm breathless how nicely it fits. Except...why are the hinges a good quarter inch from touching the lower frame? If I try to screw those in place, the front of the lid lifts a quarter inch, and it will stress those old hinges. Who knows why? Old wood, new wood, wood is a very dynamic medium. It changes shape and character. It kinks and warps and curls. Maybe the old wood and the new wood just didn't want to be friends. My advisor friend and I both decided that shims were the only solution. So, more delay. Off to the scroll saw to cut, sand and shape tiny little pieces of quarter inch material. I finished them with antiquing wax, and they almost perfectly matched the hinges, also refurbished with wax. You could hardly tell they were there. Meanwhile, my son had seen the project and mentioned he thought it was cool that I had used the original slotted screws instead of replacing them with more modern Phillips. But many of the screws had been missing from the beginning, so I didn't have enough to finish. No reason to stop now, though. Another trip to the hardware store. Buy pan head slotted screws. Bright-finished, of course, so soak them in vinegar overnight to rust them. Then a day to apply antiquing wax and let dry. Delay, delay, delay. But finally, I was ready to pre-drill the first holes and fit the faux-antique screws in place. Do not be fooled into thinking this was not without pitfall and irritation, though. I had to use spring clamps to hold the shims in place while I drilled the first hole, then remove them because they were in the way of drilling the second and third holes.
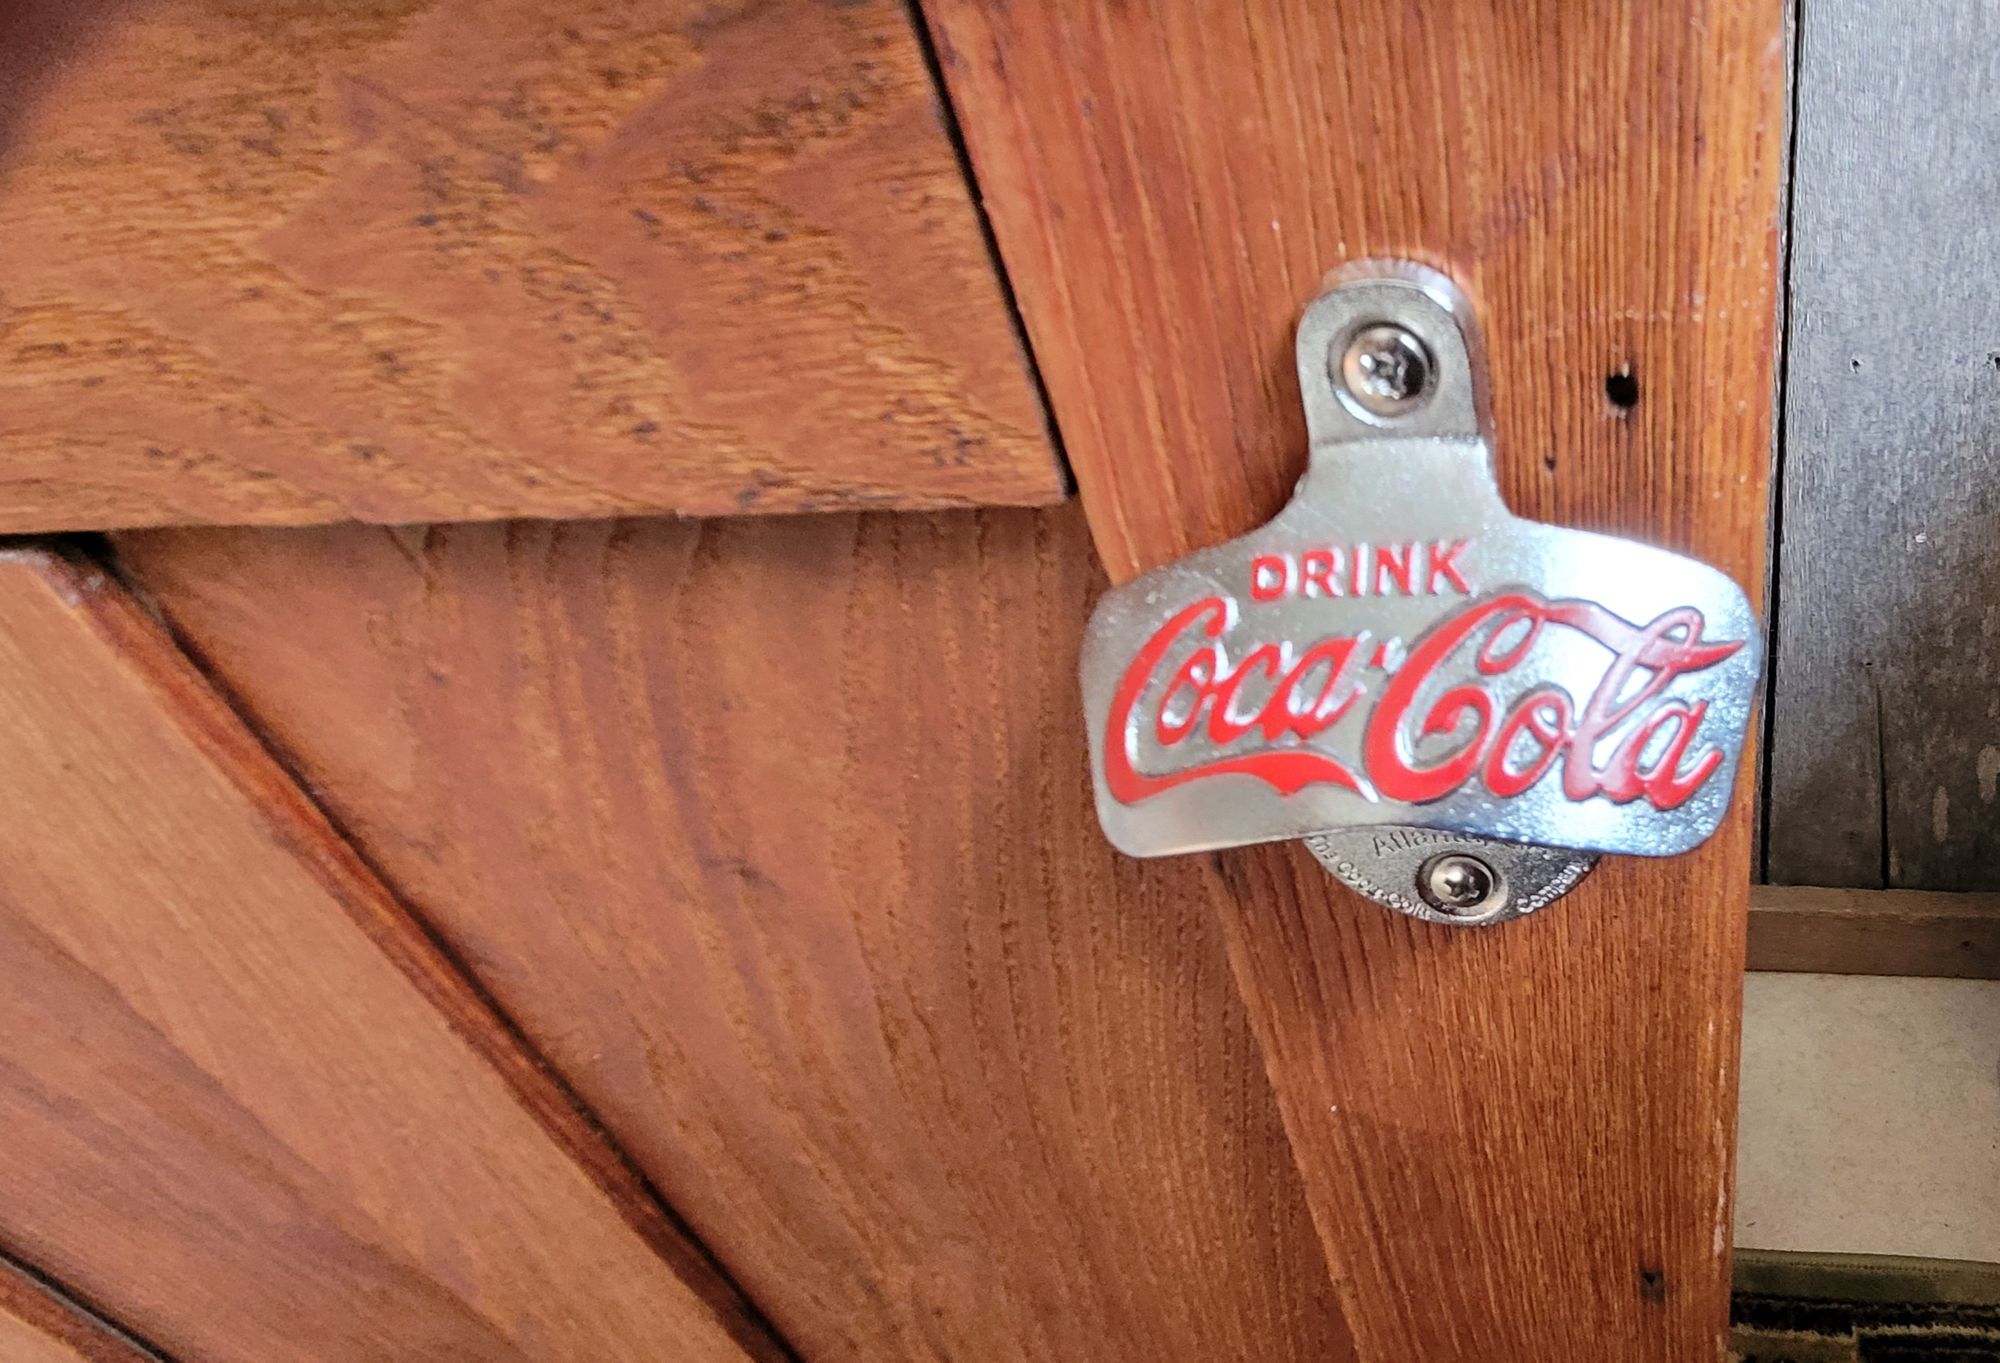
It was late and I was tired so I waited until the next day to attach the Coca-cola bottle opener to the front. With that finishing touch, I was able to step back and say it was done.
I feel a little adrift that my year-long-plus project is finished. It's sitting in my front entrance. I love it but I don't have room for it. I hope someday someone else will love it too and give it a forever home.

Footnote:
I contacted the son of the people whose estate it was acquired from, hoping for some back story. Unfortunately, he didn't even remember the piece and had no idea where it would have come from, other than his folks had owned a package liquor store and that it had probably come from a vendor. Even given that it might have been 40 years ago that they had the store, I don't ever remember seeing wooden pop coolers in my lifetime, so the vendor story seems implausible. I found no manufacturer identity on it. Its past will forever remain a mystery.